Studio Pottery Marks Identification
If you are trying to work out studio pottery marks identification, start with the evidence that is hardest to fake: marks, material, construction, and wear. This guide gives you a practical first-pass workflow so you can narrow what you have before you decide whether to keep researching, list it for sale, or ask for a professional appraisal.
If you are trying to work out studio pottery marks identification, start with the evidence that is hardest to fake: marks, material, construction, and wear. This guide gives you a practical first-pass workflow so you can narrow what you have before you decide whether to keep researching, list it for sale, or ask for a professional appraisal.
The goal is not to promise certainty from one photo. The goal is to help you ask better questions, take better photos, and spot the clues most likely to move the identification forward.
Quick identification checklist
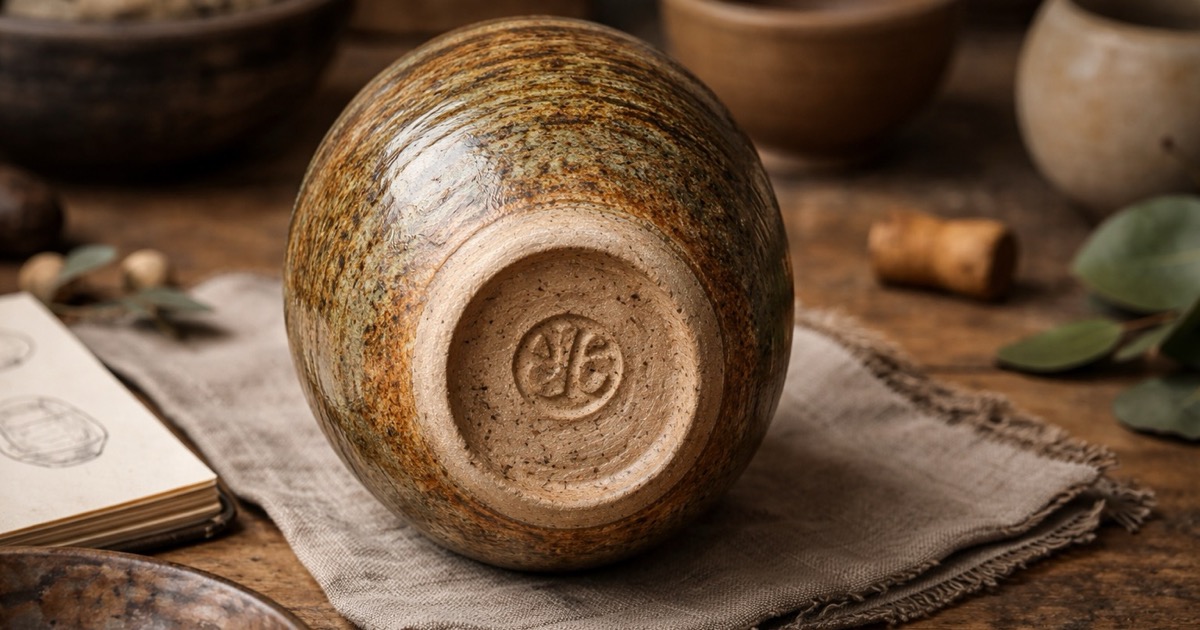
- Check the backstamp or impressed mark.
- Check the clay body color.
- Check the glaze finish and crazing.
- Check the hand-painted vs transfer decoration.
- Check the rim, foot, and handle construction.
What to inspect first
Begin with the parts of the object that carry the most diagnostic value. For this topic, that usually means backstamp or impressed mark, clay body color, and any visible maker’s marks, labels, or numbers. Write down exactly what you see before you start searching. Small wording differences on marks matter.
If the object has damage or repairs, note those too. A replacement lid, repaired foot, or modern screw can change both the dating and the confidence of your identification.
Step-by-step identification process
- Photograph the whole object first so the shape and proportions are clear.
- Capture close-ups of backstamp or impressed mark and any distinctive marks or labels.
- Compare the material, glaze, metal finish, or construction details with known examples from trusted references.
- Check whether the wear pattern matches real use and age or looks artificially added.
- Use Antique Identifier as a shortcut to narrow the likely category, era, or maker, then verify against stronger references if the item seems important.
Watch-outs and common mistakes
- dating only by crackle glaze.
- assuming all blue-and-white ware is old.
- ignoring modern reproduction stamps.
Photo tips that improve identification
- photograph the base and foot ring.
- take a close-up of decoration details.
- show translucency only if safe and appropriate.
Related guides
- Antique Pottery Marks
- Antique Porcelain Marks: How to Read Backstamps
- China Makers Marks Identification: How to Read Old China Marks
- Old China Marks Identification: What Backstamps Really Tell You
When to use the Antique Identifier app
The app is most useful after you have taken one full photo and a few tight detail shots. It can help narrow the likely type, era, and material, which makes your follow-up research faster. If the result points to something unusually rare, signed, or high value, treat that as a prompt for deeper verification rather than a final answer.
Topics