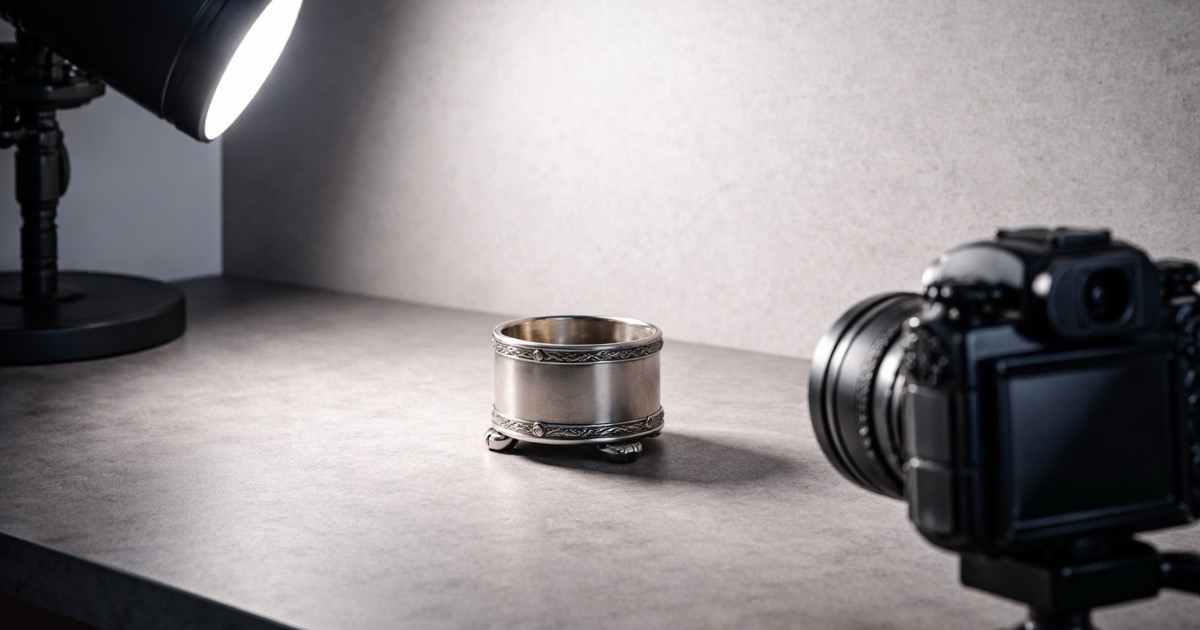
To photograph silver hallmarks well, light the marks from a low, raking angle so the stamped edges cast tiny shadows, hold the camera parallel to the surface, and use macro focus to fill the frame with the mark rather than zooming in later. A hallmark is often smaller than a grain of rice, and the difference between a lion passant and a fleur-de-lis, or between a worn “D” and an “O” date letter, can turn on a shadow line a few pixels wide. Get the light and the angle right and the marks read themselves; get them wrong and even a perfect antique looks unidentifiable.
The goal is not one lucky shot but a small set of images that a reference, an expert, or an identification app can actually work from. A single overexposed close-up taken under a ceiling light throws away most of the information in the stamp. This guide covers the lighting, focus, framing, and follow-up shots that make a mark legible, plus the common mistakes that flatten detail into a gray blur.
Quick checklist for shooting hallmarks
- Use raking (low-angle) light from one side so the stamped edges cast shadows and the mark gains relief.
- Hold the lens square to the surface; tilt distorts letter shapes and makes symbols hard to match.
- Fill the frame with the mark using macro or close-focus, not digital zoom, which just enlarges blur.
- Steady the camera on a table, box, or small tripod, and avoid the on-camera flash, which flattens detail.
- Shoot the same mark twice: once with light from the left, once from the right, so no punch hides in shadow.
- Add a wider shot showing where the mark sits on the object, and photograph every separate mark in the row.
Why silver hallmarks are hard to photograph
British and much European silver carries a row of small punched marks that together record the metal standard, the assay office, the year, and the maker. On genuine antique pieces these punches are shallow, worn by a century of polishing, and often crowded into a few millimeters. Unlike a printed label, a hallmark carries almost all of its information in relief: the raised or recessed shape of a lion, a crown, a letter, or a maker’s initials inside a shaped shield.
Relief is invisible under flat, even light. A ceiling fixture or a straight-on flash lights the whole surface uniformly, so the shallow stamp reflects the same as the metal around it and vanishes into glare. The fix is directional light. When the light comes in low across the surface, the edges of each punch catch highlight on one side and shadow on the other, and the mark suddenly stands out the way lettering on a coin does under a desk lamp. Everything else in this guide serves that one principle.
Lighting, angle, and focus
These three settings do most of the work. Get all three right on a single mark and you rarely need a fourth attempt.
| Setting | Get it wrong | Get it right |
|---|---|---|
| Light direction | Overhead or on-camera flash washes the stamp flat | One light low and to the side, raking across the surface at a shallow angle |
| Light source | Hard point light blows out the polished metal | Soft, diffused light (window, lamp through paper) that reveals shape without harsh glare |
| Camera angle | Lens tilted, so letters and symbols skew | Lens square and parallel to the marked surface |
| Framing | Zoomed in after the fact, enlarging blur | Moved physically close, macro focus, mark filling most of the frame |
| Stability | Handheld at close range, motion blur | Braced on a surface or tripod; timer or light touch to fire |
Two practical notes. First, silver is a mirror, so it reflects whatever is in front of it, including you and the camera. Shooting slightly off to one side, or lighting from an angle rather than head-on, keeps your own reflection out of the mark. Second, most phone cameras hold sharp focus better a few inches back than pressed right against the metal; if close-up shots come out soft, back off slightly and let the crop do the zooming.
Building the set of shots
One image is rarely enough. Because a hallmark is a row of separate punches, and because any single punch can sit in shadow depending on light direction, a useful record is a small sequence rather than a hero shot.
Start with a context photo: the whole object, then a medium shot showing where the marks are (base, rim, handle, or lid edge). Then move in for the marks themselves. Photograph the full row so the sequence and spacing are clear, since the order of marks is part of reading them. Then shoot each individual punch close, and repeat the tight shots with the light coming from the opposite side so a symbol that was lost in shadow the first time reads clearly the second. If the piece carries marks in more than one place, for example a teapot marked on both the body and the lid, capture each location; matching marks help confirm the parts belong together, and a mismatch is itself a clue.
Record what you see in words as you shoot, exactly as stamped, without guessing at meaning. The four compulsory parts of a modern UK hallmark are the sponsor’s (maker’s) mark, the fineness (millesimal) number, the assay office mark, and, historically, a date letter (Assay Office London). Older pieces show a symbol-based standard mark such as the lion passant for sterling rather than a number. Getting a clean, correctly ordered set of photos is what lets a reference decode that row into a standard, a city, and a year.
Reading the marks after you shoot
Good photos are the input; a reliable reference is what turns them into an identification. Hallmarking in Britain dates to a 1300 statute and has been administered through the assay offices and the Goldsmiths’ Company for centuries, which is why the system is so precisely documented and so datable (The Goldsmiths’ Company). Each assay office used its own town mark, and the date letter changed annually on a published cycle, so a legible photo of the full row can often be narrowed to a specific year and city.
Work from the clearest evidence first. The standard mark tells you the metal, the town mark tells you where it was tested, and the date letter, matched against that office’s published alphabet cycle, tells you when. Because worn or partial punches are easy to misread, hedge dating claims until the marks are unambiguous, and treat import marks, later retailer stamps, and electroplate marks as separate signals rather than assuming one mark dates the whole object. For a full walk-through of decoding a sterling row, see Sterling Silver Hallmarks: What the Marks Mean, and for the maker’s-initial punch specifically, Silver Makers Marks Identification: How to Read Maker Stamps covers how sponsor marks are structured and matched.
One important caution before you invest hours in research: confirm you are looking at solid silver at all. Electroplated pieces carry marks like “EPNS” or “A1” that can look official at a glance but mean silver over base metal, not sterling; Silver Plate vs Sterling Silver: How to Tell the Difference covers how to separate the two before you start decoding a date letter that plate does not have.
Watch-outs and common mistakes
- Using the on-camera flash or shooting under flat overhead light, which erases the relief that makes a stamp readable.
- Zooming in with the camera instead of moving closer, which enlarges blur rather than adding detail.
- Photographing only one mark from the row and losing the sequence, spacing, and order that references rely on.
- Lighting from a single side only, so a punch that sits in shadow never appears in any frame.
- Wiping a mark hard with polish or a cloth before shooting, which can blur soft edges and remove evidence of wear.
Common questions
What is the best light for photographing silver hallmarks?
Soft, directional light coming in low and from one side is best. A raking angle makes the shallow stamped edges cast small shadows so the mark gains relief, while a diffused source such as a window or a lamp shone through paper prevents the polished metal from blowing out into glare. Avoid the on-camera flash and flat overhead light, which erase the very shadows that make a hallmark legible.
Why do my silver hallmark photos look blurry or washed out?
Two causes dominate. Blur usually comes from shooting handheld too close, where tiny movements throw off macro focus; bracing the camera on a surface and backing off an inch or two often fixes it. A washed-out, detail-free look comes from flat or head-on light reflecting off the mirror-like metal, so switch to low, angled light from one side and the stamp will regain its shape.
Can a phone camera photograph hallmarks well enough to identify them?
Yes, most modern phone cameras resolve hallmarks well if you control light and distance. Use the phone’s macro or close-focus mode, hold the lens square to the surface, light the mark from a low side angle, and steady the phone on a table. Take several frames with the light from different sides, then keep the sharpest, since the limiting factor is almost always lighting and stability, not the camera’s resolution.
Related guides
- Sterling Silver Hallmarks: What the Marks Mean
- Silver Makers Marks Identification: How to Read Maker Stamps
- Silver Plate vs Sterling Silver: How to Tell the Difference
- Antique Marks Identification: How to Read Antique Marks
When to use the Antique Identifier app
The app is most useful once you have a clean set of shots: one full photo of the object, a medium shot showing where the marks sit, and tight, well-lit close-ups of the hallmark row from a couple of light angles. From those it can help narrow the likely standard, assay office, and era, which makes your follow-up research faster and tells you whether a piece deserves a closer look. If the result points to something rare, early, or high value, treat that as a prompt to verify the marks against a dedicated reference rather than a final answer.
Sources
- Trace a Hallmark (Goldsmiths' Company Assay Office, London)
- Collectors and Custodians of Hallmarked Historical Objects (The Birmingham Assay Office)