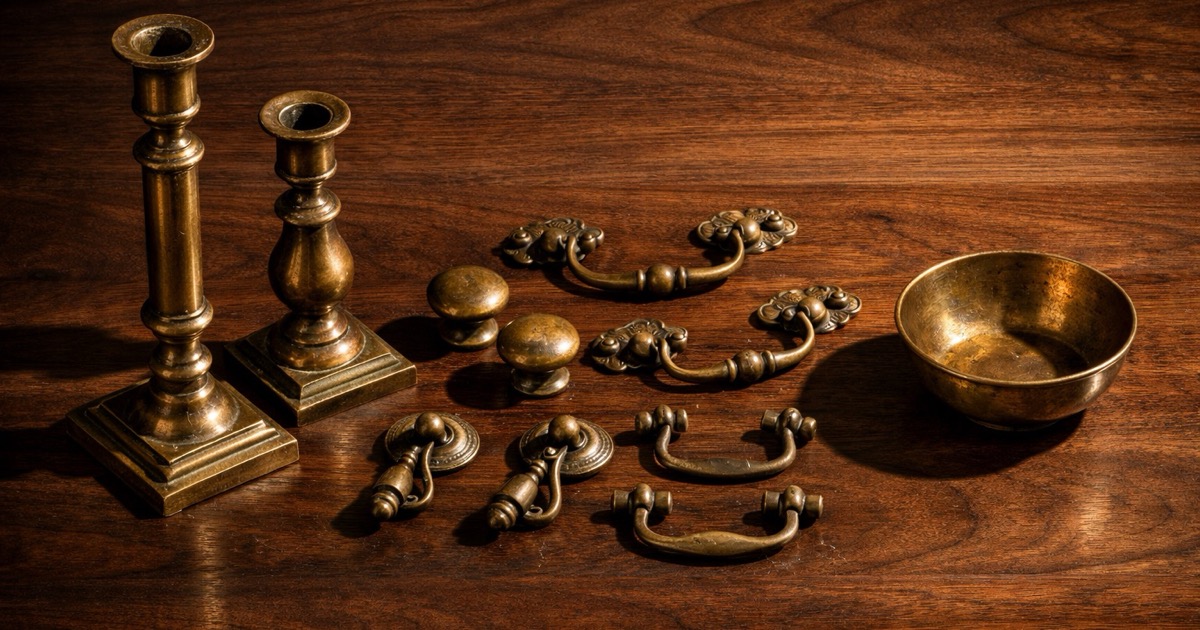
To identify antique brass, first confirm the metal is solid brass and not brass-plated steel or bronze: a magnet should not stick, a file scratch should reveal the same yellow-gold color underneath, and the piece should feel dense for its size. Then read the age from casting method, patina, and any marks. Genuine antique brass carries a deep, uneven patina, hand-finishing marks, and construction details — cast seams, hand-cut threads, riveted joints — that modern reproductions rarely reproduce convincingly.
Brass is a copper-zinc alloy that has been worked for thousands of years, so “brass” alone tells you almost nothing about age. The real work is separating solid brass from lookalikes, then finding the details that place a piece decades or centuries back rather than in a recent import bin. This guide walks the tests in the order a dealer would run them, from the fastest disqualifiers to the finer dating clues.
Quick identification checklist
- Run a magnet over the piece: solid brass and bronze are non-magnetic; brass-plated steel or iron will pull.
- File or scratch a hidden spot: brass is the same yellow-gold all the way through, while plate reveals a different metal beneath.
- Judge the color and weight: brass runs yellow to golden, bronze is browner and redder, and both feel heavy and dense.
- Read the patina: genuine age brings a deep, uneven, hard-to-remove tarnish, not a uniform sprayed-on tone.
- Look for casting seams, file marks, and hand-cut threads that point to older manufacture.
- Hunt for maker’s marks, stamps, registry numbers, and country-of-origin marks on the base or underside.
First, confirm it is actually brass
Before you date anything, settle what the metal is. Three fast tests do most of the work, and they are the same triage professionals use.
Start with a magnet. Brass and bronze are both non-magnetic, so if a magnet grabs the piece, you are almost certainly looking at brass-plated steel or iron — common on cheap hardware, reproduction beds, and decorative imports. A magnet that slides off keeps solid brass and bronze in play.
Next, the scratch or file test in a spot that will not show, such as the underside of a base or the inside of a rim. Solid brass is the same warm yellow-gold color throughout, so a light scratch reveals more of the same metal. Plated brass reveals a silvery or grey base metal under a thin gold-toned skin, often right at worn edges where the plating has already rubbed through. Then weigh it in your hand: brass is dense, and a piece that feels suspiciously light for its size may be hollow, plated, or a modern casting.
Finally, separate brass from bronze, which is easy to confuse. Both are copper alloys and both are non-magnetic, so color and surface are the tells.
| Property | Brass (copper + zinc) | Bronze (copper + tin) |
|---|---|---|
| Base color | Yellow to bright golden | Browner, reddish-brown to dull gold |
| Patina over time | Yellow-brown to dark brown | Often greenish or dark, sometimes deep chocolate |
| Typical objects | Candlesticks, hardware, instruments, andirons | Statues, bells, medals, bearings, tools |
| Surface tone | Warmer, brighter | Cooler, deeper, more muted |
These distinctions matter because copper alloys were chosen deliberately for the job: brass for its color and workability, bronze for its hardness and casting quality (Victoria and Albert Museum). If your reading is borderline, note it as “yellow copper alloy” and let stronger evidence decide rather than forcing the label.
Reading age from patina and surface
Once you know it is solid brass, the surface starts telling you about time. Real patina develops slowly and unevenly as the metal oxidizes and reacts with air, oils, and handling. It is darker in recesses and crevices, lighter on high points and touch surfaces where hands and polishing cloths have worn it back, and it resists coming off with a quick rub. That worn-in unevenness is one of the hardest things for a faker to reproduce.
Be skeptical of patina that looks too consistent. Artificial aging — chemical dips, sprayed antiquing, or applied lacquers tinted to look old — tends to sit uniformly across the whole surface, pool oddly, or wipe away to reveal bright new metal underneath. A piece that is uniformly dark everywhere, including protected areas that should never darken, has usually been treated. Conversely, an object that has been aggressively over-polished may have lost its patina entirely, which erases evidence and, on collectible pieces, can reduce value; conservators generally advise against stripping original surfaces for exactly this reason. Some genuine antique brass also carries a thin factory or repair lacquer, which can flake with age and leave a mottled look that is normal rather than suspicious.
Construction and casting clues
How a piece was made narrows the era, sometimes more reliably than the marks. Older brass was often sand-cast, which leaves a slightly grainy or pitted texture and visible casting seams (mold lines) where the halves of the mold met. On genuine older pieces you will often see file marks, chatter, or tooling where a craftsperson hand-finished those seams and surfaces rather than the flawless, seamless finish of modern die-casting or spinning.
Threads and joints are quietly diagnostic. Hand-cut or early machine threads on screws and finials are often irregular, coarser, or slightly off compared with the crisp uniform threads of modern manufacture. Look for rivets, pins, and peened joints rather than modern welds or hidden fasteners, and for assembly that shows honest wear at contact points. On lamps and candlesticks, examine how the parts stack and fasten — mismatched threads or a modern socket on an old body can signal a later marriage of components. As with the dovetail joints that date furniture, construction is the evidence hardest to fake once you know what period work looks like.
Marks, stamps, and where to look
Brass was marked less consistently than silver, but marks are worth hunting for and can be decisive. Check the base, the underside, the back, and inside rims and sockets. You may find:
- Maker’s or manufacturer’s stamps, sometimes with a company name, city, or logo.
- Country-of-origin marks. Under US law after 1891, imports were generally required to be marked with the country of origin, and “Made in [Country]” wording became common in the twentieth century — so an English or German origin mark, or its absence, is a rough dating clue rather than proof on its own.
- Registry or patent numbers, especially on British pieces, which can sometimes be looked up to a date range in maker and registry references (Kovels).
- Model or catalog numbers cast or stamped into the metal.
Record every mark exactly as it appears, including odd spacing and symbols, before you search — small wording differences separate one maker or era from another, and a good photograph of the mark is worth more than a rushed transcription. Because so much decorative brass carries no mark at all, treat a missing mark as normal and let material, patina, and construction carry the argument. Museum collection records are a useful way to compare forms and marks against documented dated examples (Victoria and Albert Museum).
Watch-outs and common mistakes
- Assuming yellow color equals solid brass; brass plating over steel or pot metal is extremely common on hardware and decor.
- Confusing brass with bronze or gilt; check magnetism, color, and surface before committing to a label.
- Trusting a uniform “antique” finish; evenly applied dark tone is often artificial aging, not age.
- Over-polishing before identifying, which strips the patina and evidence and can hurt value on collectible pieces.
- Reading “solid brass” listing language as proof; verify with the magnet and scratch tests yourself.
- Forcing a maker attribution from an unmarked piece, which damages both trust and resale.
Photo tips that improve identification
- Take a full-object photo first so form and proportions read clearly, then tight detail shots.
- Photograph every mark, stamp, and number straight on, with one wider shot showing where it sits.
- Capture the base, underside, and any seams or joints where casting and construction show.
- Shoot the patina in raking window light rather than flash, so the uneven tarnish and wear pattern are visible.
Common questions
How can you tell real brass from brass-plated metal?
Run a magnet over the piece and scratch a hidden spot. Solid brass is non-magnetic and shows the same yellow-gold color all the way through, while brass plating over steel or iron will pull a magnet and reveal a different metal beneath the surface at worn edges or under a light file. Plated pieces also tend to feel lighter and show the base metal wherever the thin coating has rubbed away.
How do you tell brass from bronze?
Color and surface are the main tells, since both are non-magnetic copper alloys. Brass runs yellow to bright golden, while bronze is browner and more reddish, often ageing to a darker or greenish patina. When it is genuinely ambiguous, describe it as a yellow copper alloy and let the object type and any marks guide you, because bronze was favored for statues, bells, and bearings while brass dominated candlesticks, hardware, and instruments.
Does patina prove that brass is antique?
Not on its own, but genuine patina is strong supporting evidence. Real age produces a deep, uneven tarnish that is darker in recesses and worn back on high-touch points, and it resists quick removal. A uniform, sprayed-looking finish or one that wipes off to bright metal suggests artificial aging, so weigh patina alongside casting method, construction, and marks rather than treating it as proof by itself.
Related guides
- Silver Plate vs Sterling Silver: How to Tell the Difference
- Silver Makers Marks Identification: How to Read Maker Stamps
- How to Photograph Silver Hallmarks
- How to Date Furniture by Dovetail Joints
- Antique Appraisal Guide: When to DIY and When to Hire Help
When to use the Antique Identifier app
The app is most useful after you have taken one full photo and a few tight detail shots of the base, marks, and patina. It can help narrow the likely type, era, and material, which makes your follow-up research faster and gives you a starting category to check against museum and maker references. If the result points to something unusually rare, signed, or high value, treat that as a prompt for deeper verification rather than a final answer.